Linux Mint with a Kali Themed Twist
Some good ol fashioned customization to make Linux Mint just the way I like it... Like Kali.


I absolutely love working in Kali. I used to play around with it a lot back in the days of Backtrack, and it was much more rough around the edges. So when I jumped back into using the more modern Kali, I was blown away with how cleanly everything was laid out. Especially the terminal. It's beautiful and downright capable. But I don't always want to load up Kali just to work in a Linux environment I like.
When I made this site, I decided to make a new designated VM Linux build for handling everything related to managing Geekly. I decided to give Mint and spin, and liked it well enough. Except I really missed the look and feel of Kali (especially that terminal!). So I set out to bring over all the things that I liked from Kali, without the 1337hAxOr tools. The end result is a build of Mint Xfce that feels nice and comfy, where I can code away in peace and serenity.
If this sounds like your kinda jam, I've put together a little tutorial to walk through the whole process.
First ingredient: Fresh Mint
First off, you're obviously gonna need to install Mint if you haven't already. Specifically, the Xfce Edition.
 Linux Mint
This was all done on Mint 21, so your mileage may vary if there have been significant changes between when this was written and when you're reading it.
Guest Additions for VirtualBox
If you aren't running this Mint build as a VirtualBox VM, you can skip this section. It's not even strictly necessary even if you are (I've included links to all the required files so that having a Kali machine isn't even necessary), but it just makes life a little easier and I like to do it right off the bat when I create a new VM (unless I want it to be sandboxed and isolated, but that's a whole different tutorial). But it's quick and painless enough to include here, so if you're running this build on VirtualBox, you'll probably want to install the VB Guest Additions to make your life a little easier. It will allow you to share folders and clipboard data between the host machine and the VM.
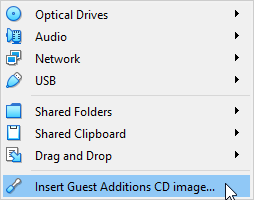
You can do this by going to the VM menu under Devices, and clicking the "Insert Guest Additions CD Image".
Open up a terminal and locate the mount location. In my case (with a username "mint") it was /media/mint/VBox_GAs_6.1.38/, in which case the command to install would be sudo /media/mint/VBox_GAs_6.1.38/VBoxLinuxAdditions.run. Restart after that and you should be able to enable clipboard copy/paste between host and guest, as well as shared folders. Those options are all available under the same Devices menu shown above.
Did you update && upgrade yet?
Even after a fresh install of the latest release, there are usually still quite a few patches to go out and grab. A simple sudo apt update && sudo apt upgrade will do the trick.
Main Kali Theme
Next, let's grab the Kali theme files. Download and extract to a location of your choice. We're just gonna pick through and grab a few select configurations.

I'm going to assume you've downloaded your copy to Downloads and extracted its contents to kali-themes-kali-master, so the path to the extracted files would be ~/Downloads/kali-themes-kali-master/. You can put it anywhere you like, but the commands to copy files from this will have to be modified accordingly.
Copy the Kali-Dark theme and icons and set permissions:
sudo cp -r ~/Downloads/kali-themes-kali-master/share/themes/Kali-Dark/ /usr/share/themes/Kali-Dark
sudo cp -r ~/Downloads/kali-themes-kali-master/share/icons/Flat-Remix-Blue-Dark/ /usr/share/icons/Flat-Remix-Blue-Dark/
We want to set the permissions for files and directories separately.
sudo chmod 755 $(sudo find /usr/share/themes/Kali-Dark -type d)
sudo chmod 644 $(sudo find /usr/share/themes/Kali-Dark -type f)
sudo chmod 755 $(sudo find /usr/share/icons/Flat-Remix-Blue-Dark -type d)
sudo chmod 644 $(sudo find /usr/share/icons/Flat-Remix-Blue-Dark -type f)
Then we're going to want to update the icon cache.
sudo gtk-update-icon-cache /usr/share/icons/Flat-Remix-Blue-Dark/Let's also grab the system fonts while we're at it.
sudo apt install fonts-cantarell fonts-firacodeNote: if apt is unable to locate the packages, you may need to add the universe depository and update with sudo add-apt-repository universe and sudo apt update.
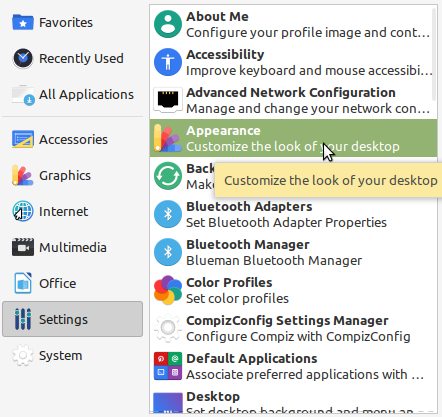
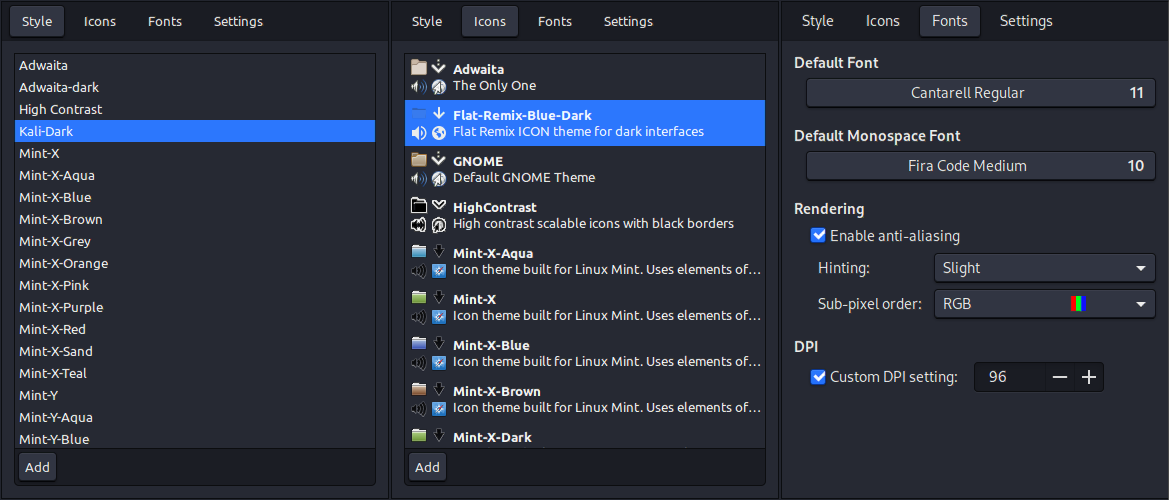
Open up the Settings | Appearance menu, and select the Kali-Dark theme in the Style tab, Flat-Remix-Blue-Dark in the Icons, and Cantarell 11pt with Firacode Medium 10pt in the Fonts tab.
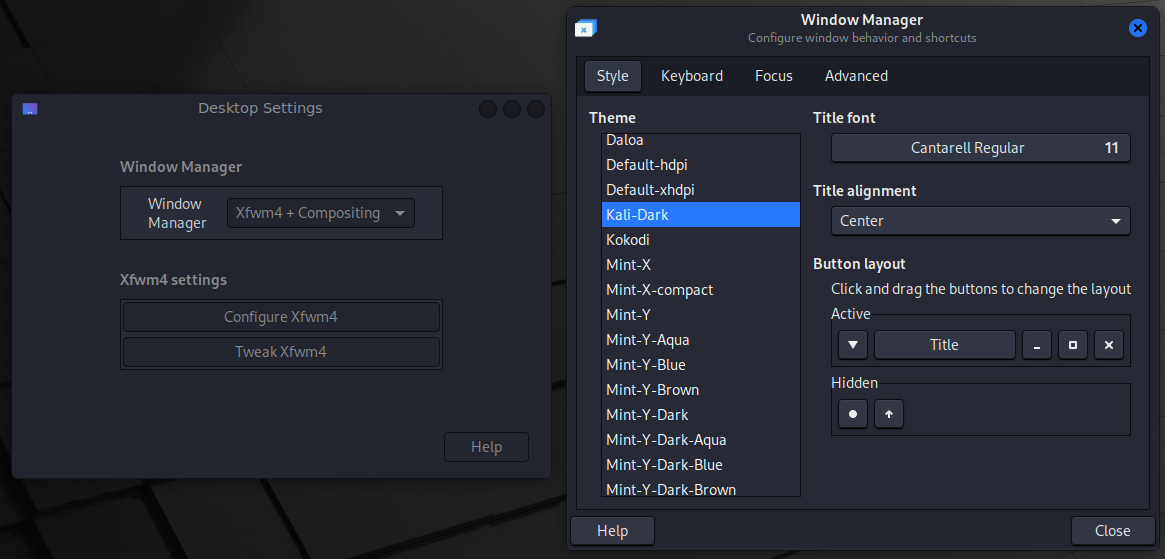
We'll also want to open up Settings | Desktop Settings and "Configure Xfwm4" to recognize the Kali-Dark theme.
Task Bar Layout
I've liked the top-bar layout in Kali, but I also ended up liking the bottom-bar configuration for Mint. Maybe it helps me more readily differentiate what environment I'm in when I'm switching back and forth between VMs. But if you end up not liking the bottom layout, you can change it.
Uncheck the Lock panel option and hit close. This will give you little handles on the far left and right sides with which you can drag the entire panel up to the top.

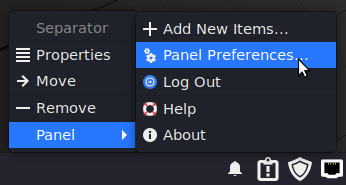
You can also add the workspace manager if you like working across multiple desktops to keep things organized. Just open up the panel menu again and hit Add New Items. Way down at the bottom, you want to add the Workspace Switcher. Once it's on there, move it into place where you like it.
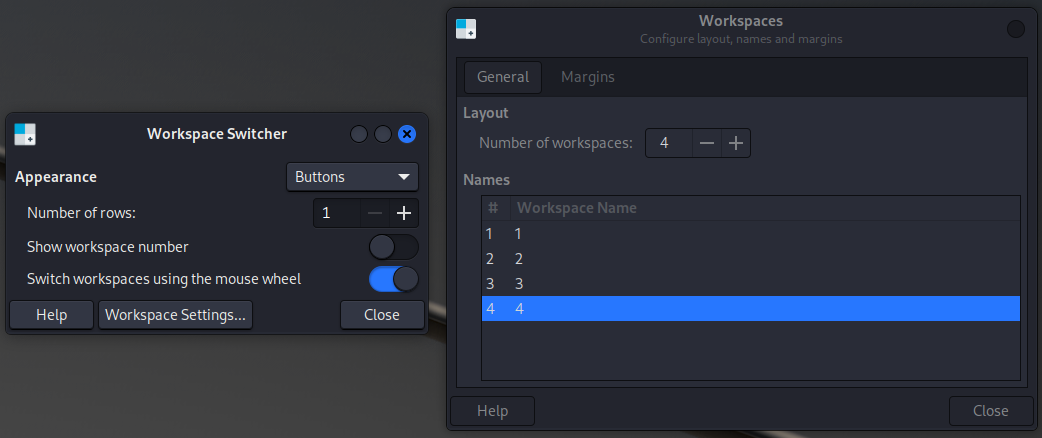
Kali uses numbered buttons for the workspaces.

To recreate that, right click on the workspace widget and open up the properties for it.
Set appearance to "Buttons" and rows to 1. Then open up the Workspace settings and replace the verbose names with just numbers.
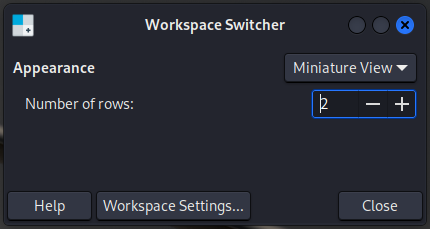
I personally prefer a different setup using the miniature view because it shows me the window arrangements currently on the workspaces, and I can drag windows between them easily.

If you'd prefer this setup as well, it's as simple as changing the properties over to Miniature View and setting the number of rows to 2.
You can also add separators to your liking. Remember that when you add new components to the panel, they'll show up on the far right. So if you've added a bunch of separators and they're just not showing up, be sure to check over there. They can be easy to overlook.
The star of the show
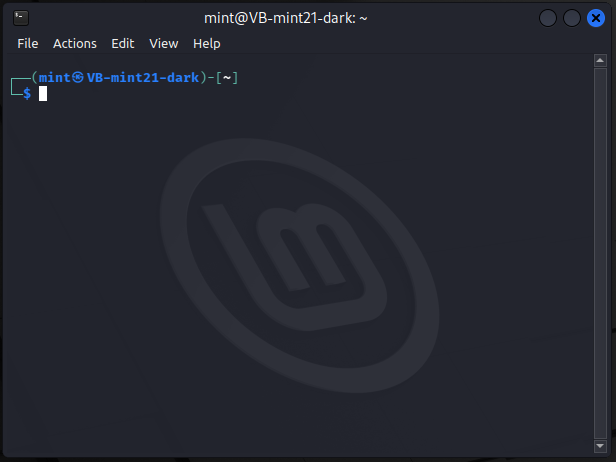
The next bit is one of the main features that I wanted to bring over. I love the look and feel of the terminal in Kali. And I was a bit bummed that it didn't magically show up the way I liked it when I copied over the theme files. Bummed, but not surprised.
The default look of the Mint terminal just... ain't my thing. It's not that it's bad. But look at it next to the Kali terminal and tell me what you think. (Hint: I will only accept answers pontificating on the magnificent aesthetics of the Kali terminal over those of the Mint terminal.)
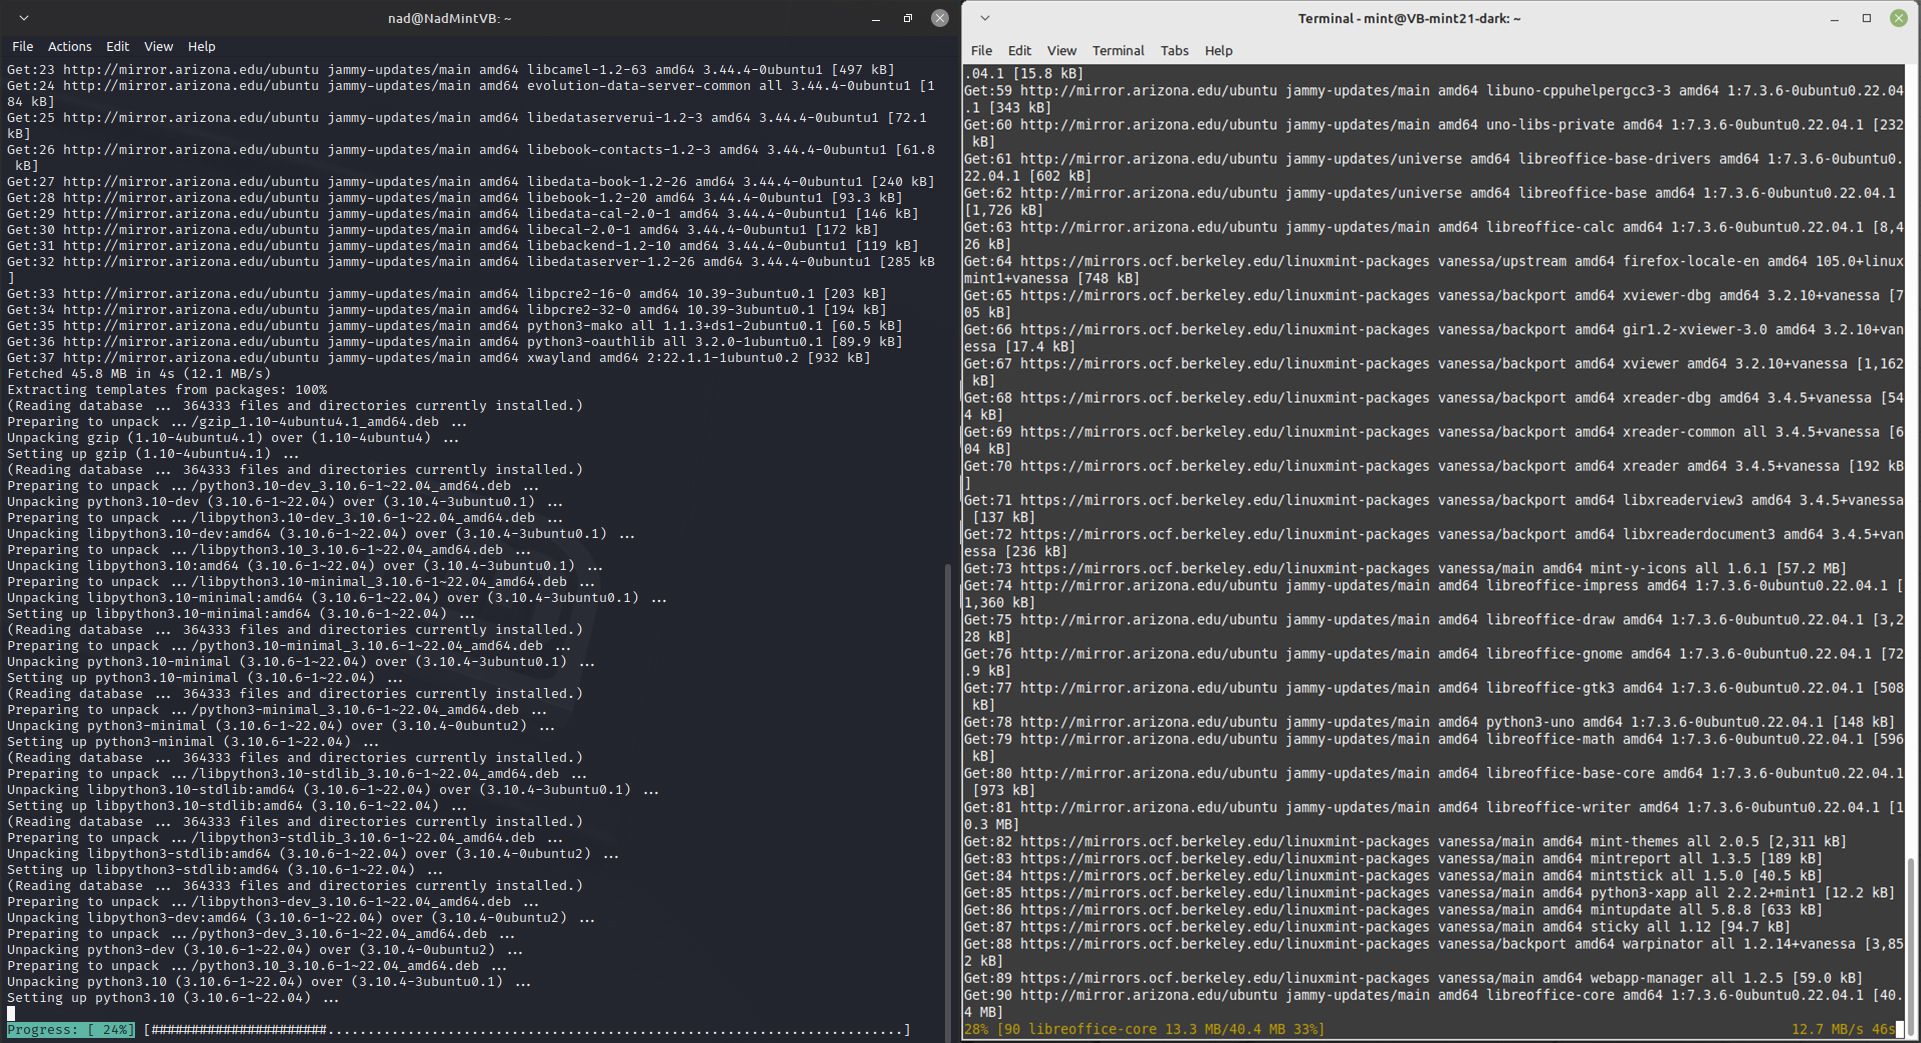
I'm glad you agree. Let's fix this.
Thankfully, I found this thread which led me in the right direction. Forum user f33dm3bits did most of the legwork on figuring this out. I'm going to deviate a little bit from those instructions, but the gist is the same.
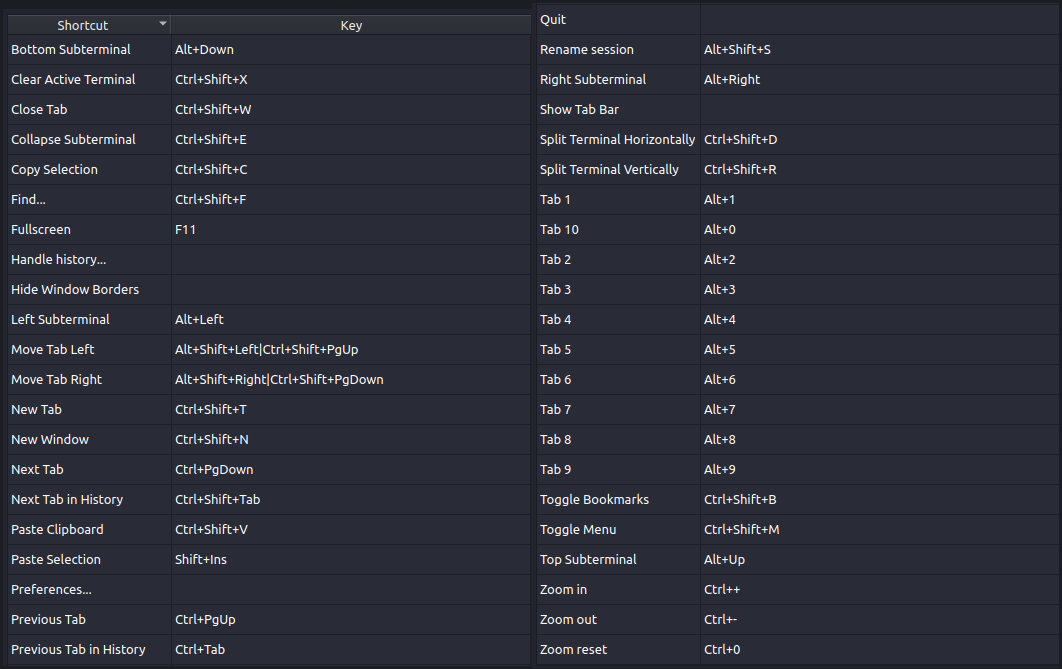
Getting Kali's terminal just right will take a few things. Qterminal, zsh, some files, and some tweaks to get it all clicking together.
That glorious font is called FiraCode. It's a monotype font with ligatures (meaning symbols like == and =/= have special renditions) and some very slick choices in text alignment that are chef's kiss. We already installed it earlier, so it'll be good to go. But if you're interested in what it does, you can read more about it here.
 tonsky
Now let's grab zsh and qterminal.
sudo apt install zsh qterminalWe'll want to grab ~/.zshrc from Kali and bring it in to Mint.
daniruiz
You can do this by copy/pasting into an editor, or by downloading it and moving to the home directory. In my case, it downloaded as index.zshrc so I just did mv ~/Downloads/index.zshrc ~/.zshrc and chmod 644 .zshrc to set the correct permissions.
Then we'll want to change the shell over to zsh:
chsh -s /bin/zshThen log out and log back in.

Looking better already. Still got a bit left to do, however.
The forum post describes using the following lines at this point:
autoload -Uz compinit promptinit
compinit
promptinit
However, the .zshrc from Kali already contains autoload -Uz compinit and compinit -d ~/.cache/zcompdump. I'm not sure if promptinit is required to achieve the same prompt behavior, but there's no harm in including those commands despite the presence of compinit in the config file.
We definitely want to grab the autosuggestions module though.
sudo apt install zsh-autosuggestionsNow let's get ready to switch over to qterminal. First, let's copy over the color scheme from the Kali theme files.
sudo cp ~/Downloads/kali-themes-kali-master/share/qtermwidget5/color-schemes/Kali-Dark.colorscheme /usr/share/qtermwidget5/color-schemes/Kali-Dark.colorschemeDo a quick check with ll /usr/share/qtermwidget5/color-schemes (ll is an ls alias for ls -l which shows permissions) and make sure the copied file has the same permissions as the rest of the files. If not, you can run sudo chmod 644 /usr/share/qtermwidget5/color-schemes/Kali-Dark.colorscheme.
Let's get out of xfce terminal and switch the launcher over to qterminal.
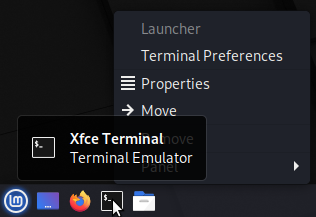
Go to the Properties for the terminal launcher and edit it to use qterminal instead.
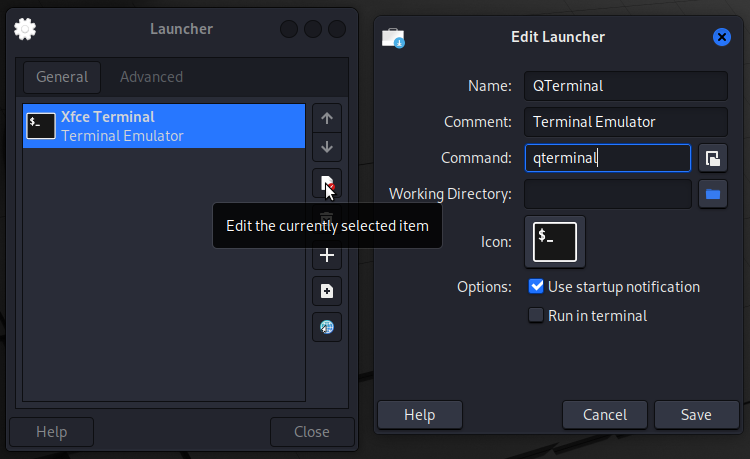
Save it and open up a new terminal!
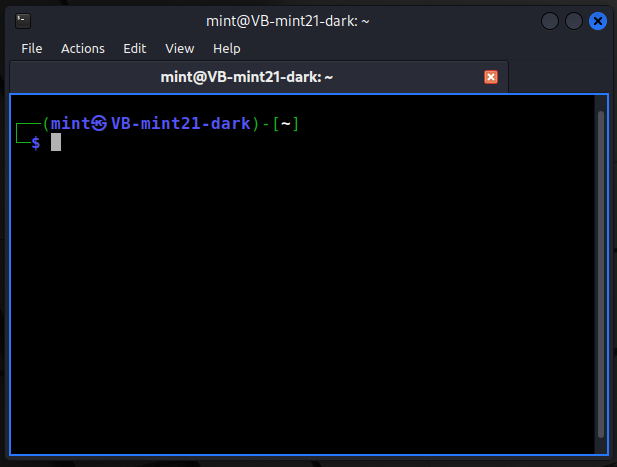
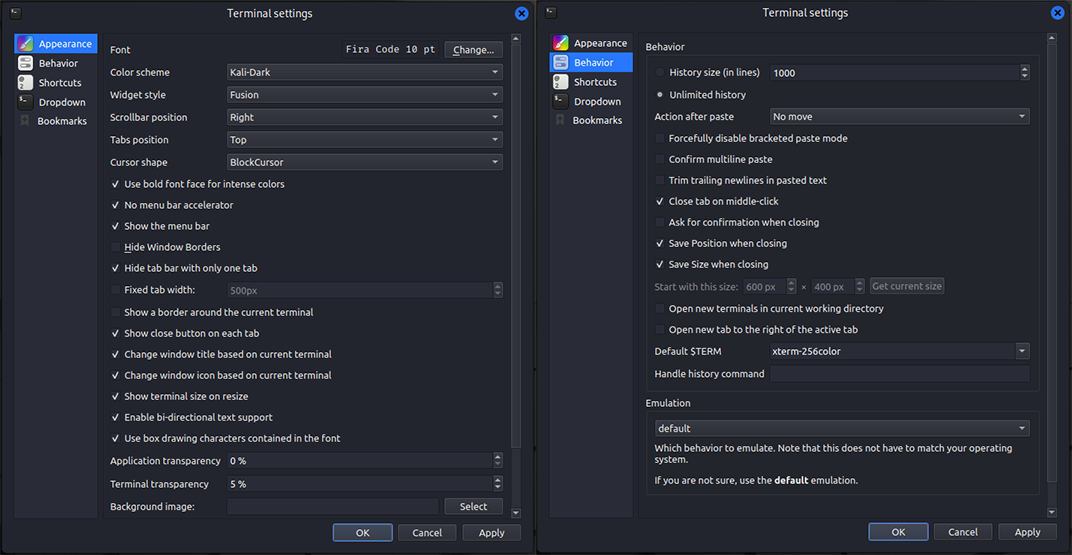
Don't worry, we'll set things right. Open up File | Preferences and change the font, color scheme, widget style, and other settings as shown below.
Odds and ends
At this point, everything should be looking pretty decent. There are a few more loose ends and they're all entirely optional. (To be fair though, this entire endeavor is entirely optional, so we might as well keep playing around with it.)
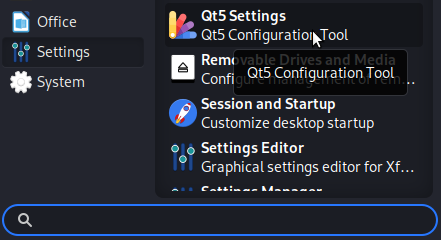
Qt5 Configuration Tool
Copy these files over real quick:
sudo cp ~/Downloads/kali-themes-kali-master/share/qt5ct/colors/Kali-Dark.conf /usr/share/qt5ct/colors/Kali-Dark.conf
sudo cp ~/Downloads/kali-themes-kali-master/share/qt5ct/qss/fusion-simple-scrollbar.qss /usr/share/qt5ct/qss/fusion-simple-scrollbar.qss
Again, you'll want to check the permissions and make sure they're correct. Assuming they're all good, let's open up the Qt5 Configuration Tool.
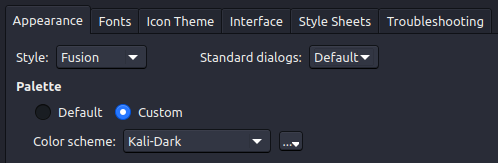

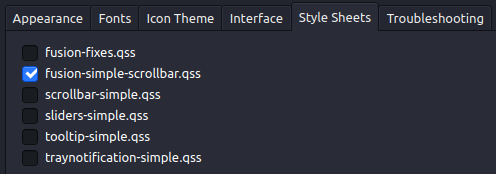
This will bring over the nice slim profile scrollbar as well as the fonts and theme configurations for certain contexts.
CPU Graph
Entirely unnecessary, but who doesn't like CPU graphs?
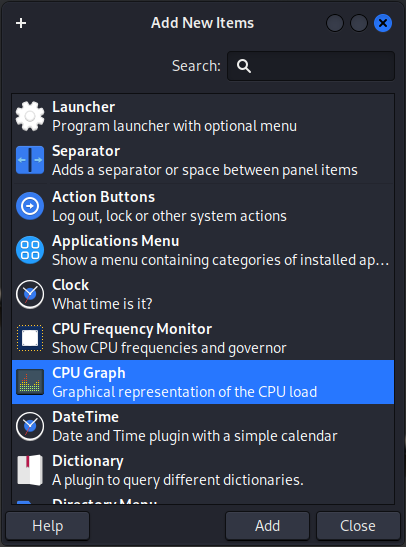
Kali uses this one in particular:
We can just install it with apt.
sudo apt install xfce4-cpugraph-pluginRight click on the panel and add a new CPU Graph to it.
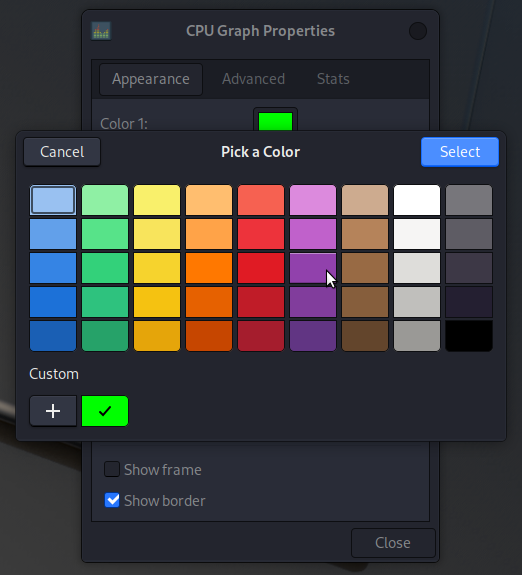
It'll pop up way in the corner, hiding behind the clock. Go ahead and move it to where you want it, then bring up the properties for it. We just want to alter something from default to make it create a configuration file for it.
Head on over to your ~/.config/xfce4/panel directory and edit the cpugraph file. For me it was cpugraph-16.rc, but the specific number may be different for you. The little trick involved here is that the panel config files are loaded when the panel is loaded and saved again when the panel is closed. So editing the file while the panel is running will just be replaced with the extra hideous config we just created. So have an extra terminal open to stop the panel and restart it. Whether you load the file up in a gui editor, nano, vim, or whatever else, make your edits, shut down the panel, save the config, then start the panel up again.
Replace everything in the file with the following:
UpdateInterval=0
TimeScale=0
Size=128
Frame=0
Border=0
Bars=1
ColorMode=1
Foreground1=rgb(39,119,255)
Foreground2=rgb(0,255,224)
BarsColor=rgb(0,255,224)
PerCore=0
TrackedCore=0
InTerminal=1
StartupNotification=0
Close down the panel before saving with xfce4-panel -q, save the edited config file, and start the panel back up with xfce4-panel &. (The & will let you get back to a prompt and shut the terminal down without losing the panel. If the prompt doesn't show up immediately once the panel is running again, just hit return and it should pop up.)

Spicy root (optional)
This is completely optional (and entirely at your own risk), but you can also set the shell for root and enable a skull prompt as an additional visual indicator by copying over .zshrc to root's home and uncommenting the following line.
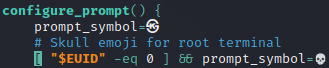

Again, it's up to you if you want to enable that. I thought it was nifty enough to share, and while I'm not one to gatekeep it should still be noted that missteps as root can come with consequences. If you aren't sure how to log in as root, or haven't ever messed with it before, don't feel bad about giving this a pass.
There are quite a few more configuration files for other contexts provided in the Kali theme files, and you can go as far down the rabbit hole as you'd like. This is about as far as I wanted to take it, but you're free to take a stroll through the theme files and pick out what you want from them. For instance, if you prefer to use the Xfce4 Terminal, there are Kali theme files for it. Or if you want the Kali themed syntax highlighting for Xed, you can copy over the gtksourceview files and set the theme in Xed.
There's a lot in there to scope out. Keep in mind you can also always compare to Kali itself to find what settings it uses. Enjoy!